Peel and stick wall murals cost less to install, apply with self-adhesive backing, and offer modern design flexibility, while traditional wallpaper requires paste, professional help, and supports more permanent, textured styles. Peel and stick options range from $1.50 to $6 per square foot and last up to 5 years, while traditional wallpaper can cost more with labor but last over a decade. This guide compares both types across cost, installation, design versatility, and long-term value so you can choose the best fit for your space.
Let’s explore the key differences in plain terms, and help you decide which one is right for your space.
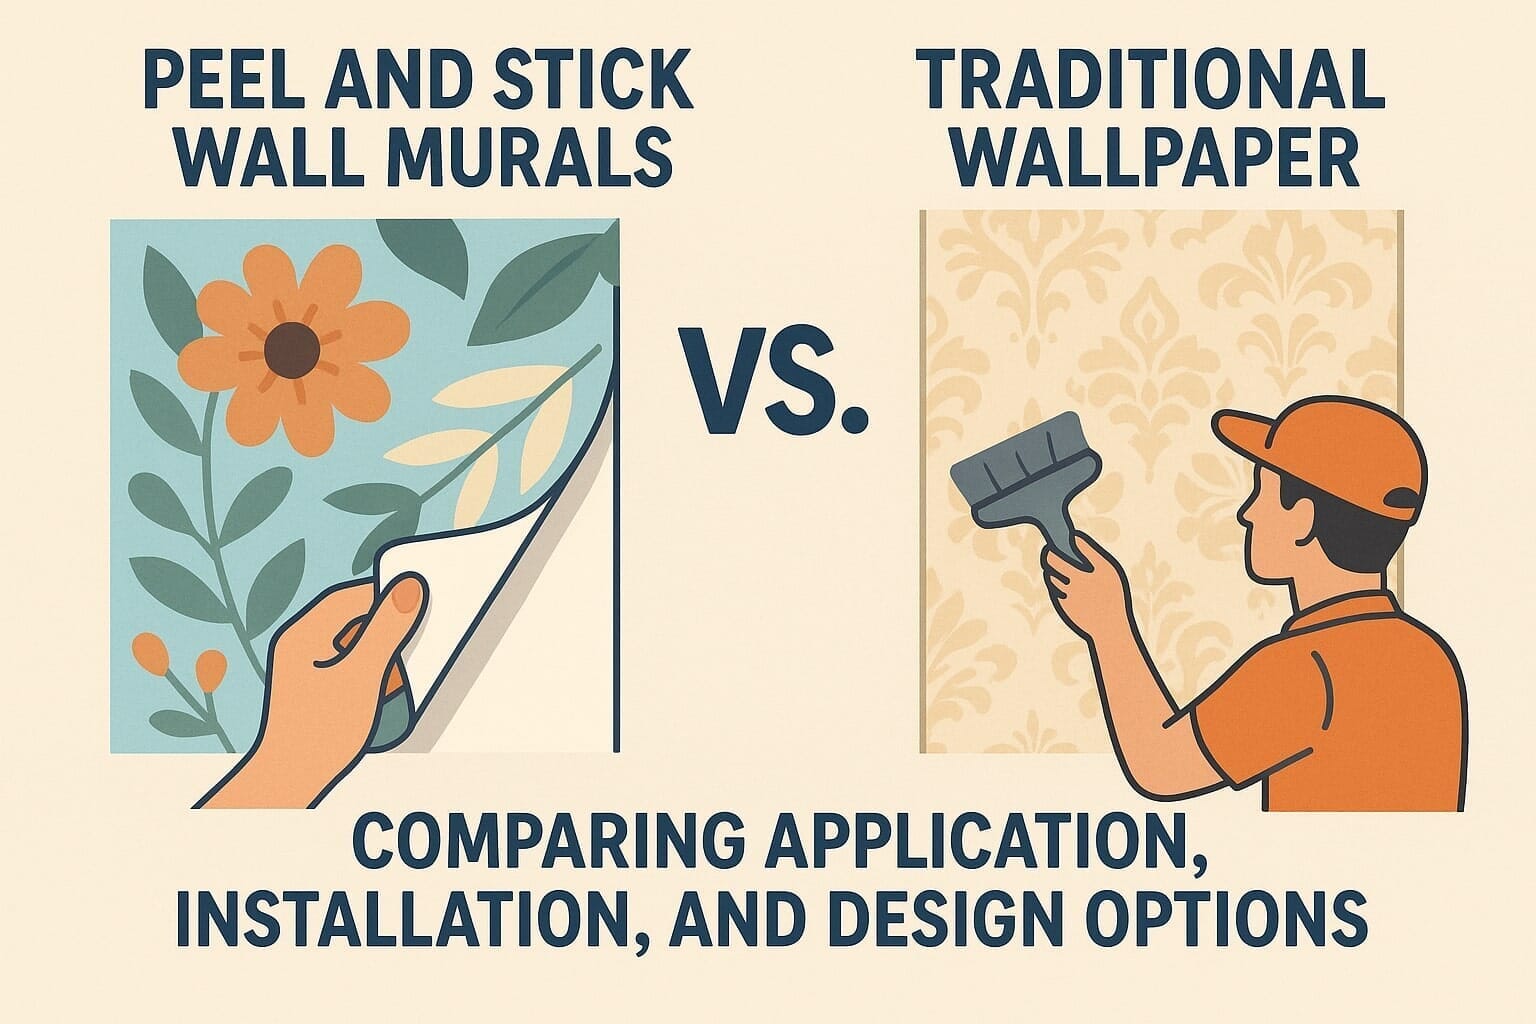
Let’s start with the big picture: how are these two wall covering methods fundamentally different?
The key difference between peel and stick wall murals and traditional wallpaper lies in how they’re installed and removed. Peel and stick murals feature a self-adhesive backing that allows for quick application on clean, smooth surfaces—making them ideal for renters or short-term decor. These murals adhere securely to smooth walls without the need for additional adhesive, making the process fast and mess-free.
In contrast, traditional wallpaper requires paste, careful alignment, and more prep time—often necessitating professional installation. The use of paste not only secures the wallpaper in place but also contributes to its long-lasting durability, especially in formal or high-traffic interiors.
Here’s a quick breakdown of how these two wallpaper types compare:
|
Feature |
Peel and Stick Wall Murals |
Traditional Wallpaper |
|---|---|---|
|
Adhesion Type |
Self-adhesive backing — no paste required |
Requires wallpaper paste |
|
Installation Effort |
Easy installation, great for DIY enthusiasts |
Complex, often needs professional installation |
|
Removability |
Temporary solution, renter-friendly |
Permanent option, harder to remove |
|
Durability |
Lasts 1–5 years |
Long-term solution (10–20 years) |
|
Best Use Case |
Budget-friendly projects, rentals, design flexibility |
Long-term investment, textured finishes |
|
Customization Options |
Customizable, trendy patterns, easy to adjust |
More traditional styles, formal and classic settings |

Peel and stick wallpaper offers a convenient and mess-free option for renters, DIYers, and anyone looking to refresh a space without long-term commitment. Below is a balanced look at its strengths and drawbacks:
Effortless application process — No additional tools or paste required
Quick installation — Entire panel can be applied in just a few hours
Wide range of contemporary designs — Customizable to fit your decor vision
Removability — A temporary solution perfect for rentals and seasonal updates
Affordable choice — Ideal for budget-conscious projects or short-term makeovers
Surface versatility — Works best on smooth, clean surfaces
Edges may lift — Especially on textured or uneven walls
Adhesion affected by humidity — Not suitable for moist environments without vinyl backing
Panel alignment may require careful pressing — To avoid air bubbles during installation
Color inconsistencies — Minor shifts can occur between dye lots
To ensure color cohesion, lay out all panels before starting the application. Install slightly mismatched areas in low-visibility zones (e.g., corners, behind furniture).
Traditional wallpaper, including non-woven and unpasted varieties, is a popular choice for homeowners seeking a long-term solution with timeless appeal. It offers texture, sophistication, and durability—but comes with added effort and professional installation fees.
Durability and texture — Often lasts 10–20 years and includes elegant textured surfaces
Matte finishes and classic styles — Available in a wide variety of patterns like florals, damasks, and vintage prints
Best suited for formal or permanent spaces — Excellent choice for dining rooms, entryways, and primary living areas
Designer appeal — Highly recommended by interior designers for depth, refinement, and wall design consistency
Traditional paper and fabric-backed options — Adds richness to indoor elements and complements traditional decor
Paste application required — Needs dedicated wallpaper paste and a proper surface prep
Complex installation process — Typically requires additional tools or a contractor for best results
Not easily removable — Involves a more extensive removal process
Higher upfront investment — Especially when accounting for professional labor costs

The installation process significantly impacts the cost, time, and success of your wallpaper project. DIY decorators often prefer this type of wallpaper for its straightforward application and minimal tool requirements.
Traditional wallpaper, by contrast, typically involves more steps and specialized tools. While it delivers a more polished and permanent result, it generally requires greater preparation and is better suited to professional installation for best outcomes.
Need a visual walkthrough?
Before diving into the installation steps, check out this quick video showing how to install peel and stick wall murals from start to finish.
Watch the tutorial on YouTube
Prepare the wall surface — Ensure it’s clean, dry, and smooth
Mark and measure — Establish a vertical guideline for panel alignment
Peel backing paper — Begin at the top of the entire panel
Apply and press firmly — Use a smoothing tool to eliminate air bubbles
Trim excess — Cut around edges with a utility knife
Tools Needed: Measuring tape, level, smoothing tool, utility knife
Mix wallpaper paste — Follow product instructions for consistency
Apply paste — Depending on type, apply to the wall or non-woven wallpaper
Align pattern with precision — Match patterns before pressing
Press and smooth outward — Use firm pressure to eliminate bubbles
Let paste dry completely — Usually takes 24–48 hours
Additional Tools: Smoother, brush, sponge, utility knife, level
Traditional wallpaper requires more surface preparation and precision. Hiring a contractor can prevent issues like misaligned seams, pattern distortion, or paste overflow.
A smooth and safe removal process helps preserve wall surfaces for future decor or repainting. Follow these damage-free steps tailored for both peel and stick and traditional wallpaper types.
Start at a top corner — Gently peel downward at a 45-degree angle
Loosen adhesive if needed — Use a hairdryer to soften stubborn sections
Wipe away residue — Use a damp cloth to clean remaining adhesive
Final prep — Allow the wall to fully dry before repainting or reapplying new wallpaper
Score the surface — Lightly pierce with a wallpaper scoring tool
Apply steam or hot water — Loosen paste for easier scraping
Scrape gently — Use a plastic putty knife to lift off the wallpaper
Wash the wall — Clean with mild soap and a sponge
Prime the surface — Prepares the wall for repainting or new installation
Always test a small section before full removal. Priming the wall afterward helps seal leftover adhesive and prevents bubbling in future applications.
Understanding cost per square foot, labor expenses, and overall value helps homeowners make informed decisions between short-term and long-term wall covering solutions. Here’s how peel and stick murals compare to traditional wallpaper from a financial perspective.
|
Wallpaper Type |
Material Cost (per sq. ft) |
DIY-Friendly |
Labor Cost |
Estimated Total |
|---|---|---|---|---|
|
Peel and Stick Murals |
$1.50 – $6 |
Ideal for DIY projects |
$0 (self-install) |
$50 – $150+ |
|
Traditional Wallpaper |
$2 – $10 |
More complex to install |
$100–$500 (labor cost) |
$200 – $700+ |
Let’s talk lifespan, because longevity matters if you want your decor to last.
Peel and Stick Wallpaper: 1–5 years
Traditional Wallpaper: 10–20 years
What Affects Lifespan:
Wall texture and prep quality
Humidity and moisture exposure
Cleaning method and frequency
Environmental wear (sunlight, abrasion)
Pro tip: Avoid over-washing, and don’t place peel and stick near heaters or vents.
Rental Space (Peel and Stick, 3 Years):
Total Cost: ~$70
Cost-Effective Option: ~$23/year
Ideal for short-term or seasonal decor without long-term commitment
Forever Home (Traditional Wallpaper, 15 Years):
Total Cost: ~$500
Long-Term Solution: ~$33/year
Suitable for formal living spaces and long-term investments
Budget-conscious homeowners benefit from the lower material and installation costs of peel and stick murals
Traditional wallpaper offers greater durability and design depth, justifying its upfront cost as a long-term investment
DIY projects are more feasible with stick-on wallpaper, reducing overall expenses and tool dependency
If you're after a specific look or want to personalize your space, both peel and stick and traditional wallpapers offer lots of design flexibility.
Peel and stick mural designs often feature bold graphics, scenic landscapes, or modern patterns
Traditional wallpaper patterns include textures, florals, damasks, and vintage prints
Custom wall murals allow you to upload photos, artwork, or branded visuals
Accent walls work best with high-contrast or oversized prints that define a space
Whether you're going for minimalist, maximalist, or something in between—there's a wallpaper style that fits your vision.
Peel and stick murals may not adhere properly to textured surfaces. For best results, apply only on clean, smooth walls. Always test a small panel before full installation to avoid peeling or alignment issues.
Peel and stick options are designed for damage-free removal. Start from a corner and peel slowly. If adhesive is stubborn, soften it with a hairdryer and wipe away residue using a damp cloth.
Peel and stick wallpaper uses a self-adhesive backing and is ideal for renters or temporary decor. Traditional paper wallpaper requires paste, professional installation, and is intended as a long-term solution.
Peel and stick typically lasts 1–5 years, depending on the surface and maintenance. Traditional options last 10–20 years and are more durable against environmental wear like sunlight and moisture.
Yes — peel and stick wallpaper is a cost-effective option for DIY projects. Traditional wallpaper often requires professional installation and additional tools, raising the total cost.
Peel and stick murals are the best choice for rental spaces. They’re customizable, affordable, and easy to remove without damaging the walls—making them a popular choice among renters and landlords alike.
While it's possible for experienced DIYers, traditional wallpaper typically requires more tools, surface prep, and precision. For best results—especially with patterned or textured designs—professional installation is often recommended.

Peel and stick murals are a popular choice for rental spaces because they offer a convenient, damage-free removal process. Designed as a temporary solution, they’re renter-friendly and require no nails, paste, or paint — making them ideal for apartments and short-term living spaces.
Tips for Rental-Safe Application and Removal
Prepare the surface properly — Clean and dry the wall to maximize adhesion and prevent wall damage
Choose adhesive options labeled “removable” or “easy removal” — These are optimized for short-term use
Test a small panel first — Especially important on painted or previously textured walls
Avoid humid zones — Bathrooms and kitchens may affect adhesion over time
Great for temporary wall decor in rentals, dorms, or furnished units
Pro Tip: Use vinyl-based peel and stick for better performance in warm or semi-moist environments, and avoid applying near vents or heat sources.
Surface compatibility and proper preparation are essential to a successful wallpaper application process. Whether you’re using peel and stick or traditional wallpaper, following these steps helps ensure long-term adhesion and prevents peeling, air bubbles, or wall damage.
Watch: How to Clean a Wall Surface Before Installing a Peel and Stick Mural
Proper surface preparation is essential for adhesion and longevity. Watch this short tutorial for expert tips on how to clean your wall before application.
View the cleaning tutorial on YouTube
Clean thoroughly with a damp cloth — Remove dust, oils, and debris
Smooth out wall texture — Eliminate bumps, flakes, or old adhesive to improve surface compatibility
Prime porous or uneven surfaces — Especially important for older drywall or painted brick
Check for moisture or humidity — Avoid applying in damp environments unless using vinyl-backed options
Test a small section before full application — Ensures the wallpaper adheres correctly over time
Pro Tip: Preparing the surface not only improves adhesion over time but also reduces the risk of installation issues like bubbling, misalignment, or early lifting.
Need to prep a textured wall?Read our guide on cleaning textured walls to improve adhesion and avoid peeling or bubbles.
Yes — humidity and moisture can significantly impact wallpaper adhesion over time. Kitchens and bathrooms require special consideration when choosing wallpaper types, especially if steam or water exposure is frequent.
Use vinyl wallpaper or vinyl-backed peel and stick murals — Designed for better moisture resistance
Avoid areas with direct steam or splashes — Like above stoves or next to showers
Choose water-resistant or mold-resistant adhesive — Often labeled as suitable for humid environments
Prep the wall thoroughly — Make sure the surface is dry, primed, and free of dust
Test adhesion over time — Monitor stick performance in high-moisture zones
Pro Tip: Traditional (non-pasted) wallpaper may be used in humid areas only if sealed properly and installed by a professional.
Apply on high-visibility walls — Ideal behind beds, desks, fireplaces, or TV units
Choose bold patterns or trendy prints — Scenic murals and geometric designs add visual interest
Align with your design vision — Match existing decor or introduce complementary colors
Opt for peel and stick murals with smooth application — Easily reposition panels without damaging walls
Perfect for temporary design refreshes — Especially in rentals or for seasonal updates
Pro Tip: Use a level and smoothing tool for clean application and to avoid pattern drift on large walls.

If you're seeking a personalized wall design with a lasting impression, custom peel and stick murals are a smart investment. They allow you to customize every element — from dimensions and visuals to texture and finish — adding a personal touch to both residential and commercial spaces.
Upload your own artwork, photography, or branded visuals — Ideal for businesses, nurseries, creative studios, or statement rooms
Customize wall dimensions, material, and matte or glossy finishes — Ensures a perfect fit and look
Maintain high color accuracy and DPI — Important for detailed or large-scale mural printing
Express your design vision — Turn empty walls into one-of-a-kind visual stories
Explore endless possibilities — From abstract art to family photo walls and corporate branding
Pro Tip: When ordering, measure carefully and order as one full panel set to ensure dye-lot consistency across your entire mural.
As eco-conscious design becomes more important in modern interiors, selecting wallpaper with sustainable features can reduce your environmental impact without compromising style. Many peel and stick and traditional options now use eco-friendly materials that are both safe and visually striking.
Eco-Friendly Wallpaper Features
Choose PVC-free and low-VOC wallpapers — Safer for indoor air quality and better for the planet
Look for blends of natural and synthetic fibers — These combine durability with sustainability
Certifications matter — Greenguard, OEKO-TEX, and FSC indicate environmentally responsible production
Review the product label for environmental claims — Ensure claims are backed by third-party standards
Bold prints and contemporary designs are available in sustainable varieties — You don’t have to sacrifice aesthetics
Pro Tip: Eco-friendly wallpaper is a smart choice for nurseries, bedrooms, and any indoor elements where air quality and sustainability are top priorities.
Choosing between wallpaper and paint depends on your design goals, budget, and willingness to commit to long-term upkeep. Here’s a detailed comparison to help you make an informed decision for your next renovation or room refresh.
Side-by-Side Comparison
|
Feature |
Wallpaper |
Paint |
|---|---|---|
|
Durability |
Long-lasting (10–20 years) |
Shorter lifespan (3–10 years) |
|
Design Depth |
Bold patterns, texture, and trendy or classic styles |
Solid colors, limited in texture |
|
DIY Effort |
Medium to high — requires adhesive and alignment |
Low — minimal prep and tools needed |
|
Upfront Cost |
Higher — includes labor, paste, or mural costs |
Lower — budget-friendly for quick updates |
|
Personalization |
Customizable with mural prints and patterns |
Custom only via color choice |
Wallpaper is a long-term commitment — Ideal for homeowners looking to add texture and character
Paint is perfect for budget-friendly, low-effort updates — Ideal for fast design changes
Wallpaper offers greater visual impact — A top choice for statement walls and curated decor
Pro Tip: Combine both — use paint for general walls and wallpaper for a decorative accent wall to maximize both value and style.
Even the best wallpaper can present challenges during or after installation. Understanding the most common problems — and how to fix them — will help ensure a flawless finish and long-lasting results.
|
Problem |
Likely Causes |
|---|---|
|
Peeling edges |
Inadequate wall prep, high humidity, or low-quality adhesive |
|
Air bubbles during installation |
Rushed or uneven application, poor surface smoothing |
|
Misalignment |
Skipping proper alignment tools or lacking installation skill level |
|
Poor adhesion over time |
Applying to dusty, uneven, or textured surfaces |
Use a seam roller and firm pressure — Helps reset edges and flatten air pockets
Apply wallpaper glue under lifted areas — Choose a product compatible with your wallpaper type
Warm with a hairdryer — Softens the adhesive for better reset
Focus on careful application from the start — Take time to press and smooth each panel evenly
Prep thoroughly — Clean and prime surfaces to support proper adhesion
Pro Tip: Keep extra panels or a repair kit on hand for future touch-ups.
When evaluating wallpaper, it’s important to look past the initial price and consider long-term value. Cost per square foot, durability, and use case all contribute to whether a wallpaper is a smart term investment — especially for budget-conscious homeowners.
Cost Breakdown Over Time
|
Use Case |
Total Cost |
Expected Lifespan |
Cost/Year |
Best For |
|---|---|---|---|---|
|
Peel and Stick – Rental Wall |
~$65 |
3 years |
~$22/year |
Short-term, budget-friendly projects |
|
Traditional Wallpaper – Dining Room |
~$500 |
15 years |
~$33/year |
Long-term solution, formal rooms |
Cost per square foot matters — Peel and stick is often cheaper upfront, but may require more frequent replacement
Labor and tools — DIY peel and stick installs save on labor cost; traditional wallpaper may involve professional installation fees
Longevity — A higher upfront cost can result in better value over time if the wallpaper lasts 10+ years
Match your project goals — Use cost-effective options for rentals, and term investments for forever homes
Visual consistency plays a crucial role in achieving a high-end wallpaper look. Differences in dye lots, pattern alignment, and panel positioning can lead to noticeable visual inconsistencies — especially with bold patterns and full-wall designs.
Order all wallpaper panels from the same dye lot — Prevents color difference and shading inconsistencies
Use natural breaks — Place panels behind furniture, in corners, or along architectural seams to disguise subtle color variations
Lay out the entire panel set before installation — Helps with pattern selection and ensures smoother alignment
Check pattern repeats — Aligning large-scale or abstract patterns takes careful application
Avoid mixing lots mid-wall — Even small shade differences can reduce visual impact
Pro Tip: For complex designs or wallpapers with unique color gradients, work in daylight and label panels in advance to maintain flow and consistency.
Whether you're designing a rental space, renovating a forever home, or simply updating a room’s vibe, both peel and stick and traditional wallpaper offer unique advantages. Your ideal choice depends on your personal preference, lifestyle, and long-term design vision.
Peel and stick murals are a flexible, cost-effective DIY solution perfect for temporary wall design and renters
Traditional wallpaper delivers timeless elegance and durability — a great option for long-term style and high-impact wall design
Consider your space, commitment level, and installation skill when choosing between these types
Pro Tip: Explore the design possibilities — from bold prints to subtle textures, there’s a perfect wallpaper option for every room, mood, and occasion.

Comments will be approved before showing up.


